Building an Outdoor Pergola with an Adjustable Roof: A Grandfather’s Guide to Crafting Your Garden Retreat
Building an outdoor pergola with an adjustable roof? Grab your toolbelt! It’s a fun DIY project that'll have you sweating and smiling simultaneously!
Understanding the Construction of an Outdoor Pergola with Adjustable Roof
Ah, my dear grandchild, let me share with you the intricacies of constructing an outdoor pergola with an adjustable roof. It’s not just a project; it’s a labor of love that can add beauty and functionality to your outdoor space. Now, before we dive into the details, know that this task does require a bit of work, a sprinkle of patience, and perhaps a few tools sitting in that rusted toolbox from my days. Buckle up as we explore this woodworking adventure together.
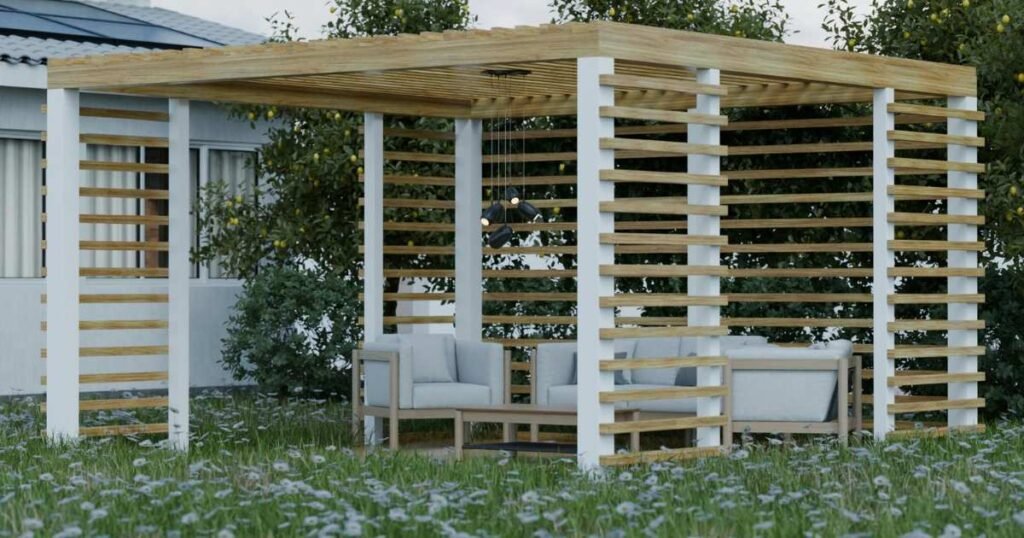
What is a Pergola?
A pergola, dear one, is a delightful structure, often made of wood, that serves to enhance the aesthetic charm of your garden or patio. It’s like a gentle embrace for your plants and a cozy spot for you to rest. The adjustable roof on a pergola allows for a flexible outdoor experience, providing shade when the sun’s out and allowing sunlight to seep through when it’s desired. It’s a splendid feature, you see.
The Amount of Work Involved
Now, let’s discuss the work involved. While every project is unique, we can break it down into some manageable steps to get a clearer picture of what lies ahead. You wouldn’t want to jump into a project without knowing how deep the waters are, would you?
1. Planning and Design
Everything begins with a plan, my dear. You’ll want to sketch out how you envision your pergola. Consider its size, shape, and the materials to use. This stage is crucial and will require some thoughtful consideration. Take your time; good things come to those who are patient.
2. Gathering Materials
Next, you’ll need to gather your materials. A typical pergola will involve wood beams for the framework, adjustable slats or a roof mechanism, nails, screws, and perhaps some concrete for the base. Depending on your preferred style, you might even want decorative elements. Remember, you can’t build a house on a shaky foundation, so choose your materials wisely.
3. Setting Foundations
The foundation is where the real work begins. You’ll need to dig post holes, set your posts with concrete, and ensure they’re level. This step can be a bit labor-intensive but rest assured, the sturdier your foundation, the longer your pergola will stand proud. Take breaks when needed and do not overexert yourself – the old bones need care too.
4. Building the Frame
Once your foundation is set, it’s time to construct the frame. You’ll need to attach horizontal beams and vertical posts, securing them tightly. This might be where you want to channel any skills you learned in your younger years. I recommend using a level to make sure everything is straight. Precision is key, and no one likes a wobbly pergola.
5. Installing the Adjustable Roof
Now comes the exciting part – the adjustable roof. Depending on your design, this might involve installing a system of slats that can be turned or a retractable covering. This may seem daunting, but take your time, and ensure all mechanisms are working correctly. Adjustability means you get to enjoy the sun or the shade depending on your mood.
6. Finishing Touches
Finally, it’s time to add those finishing touches. Perhaps a nice coat of weather-resistant stain or paint to keep the wood protected. You could also consider adding climbing vines or fairy lights for an enchanting evening ambiance. Every little touch adds character to your creation.
Time and Effort Required
Building an outdoor pergola with an adjustable roof can take anywhere from a weekend to several weeks, depending on your skill level and the complexity of your design. If you’re experienced with home projects, you might be able to do it all in one fell swoop. If not, don’t be disheartened; breaking it into smaller tasks and dedicating some weekends will get you there, too.
Conclusion
In the end, my dear child, constructing a pergola is as much about the journey as it is about the destination. It’s a chance to get your hands dirty, enjoy the fresh air, and create something lasting for generations to come. As you build, remember to take pride in each step and enjoy the labor of your love. Now go on, gather your materials, and let the construction begin! You will create a fine space to enjoy a refreshing lemonade and reminisce about the merits of enduring craftsmanship.